Sometimes, most times, simpler is better.
We created a simple check-in application that lets visitors quickly find their name and click a button (on an iPad, for example) to check in for a meeting or for an event of some kind. If they accidentally picked the wrong person when they checked in, they can uncheck in that member and then find and check in themselves.
The Check-in Application has three screens, but also maintains, for history and reporting, every check-in, ever.
1. The main check-in screen (ultra simplicity)
2. An attendance report. This is a simple listing report of everyone checked in for the current meeting. The meeting administrator would email this report, if desired, when the meeting is complete.
3. A maintenance screen. This screen lets the system administrator maintain the system with member settings and other options.
4. All Check-in History Data.
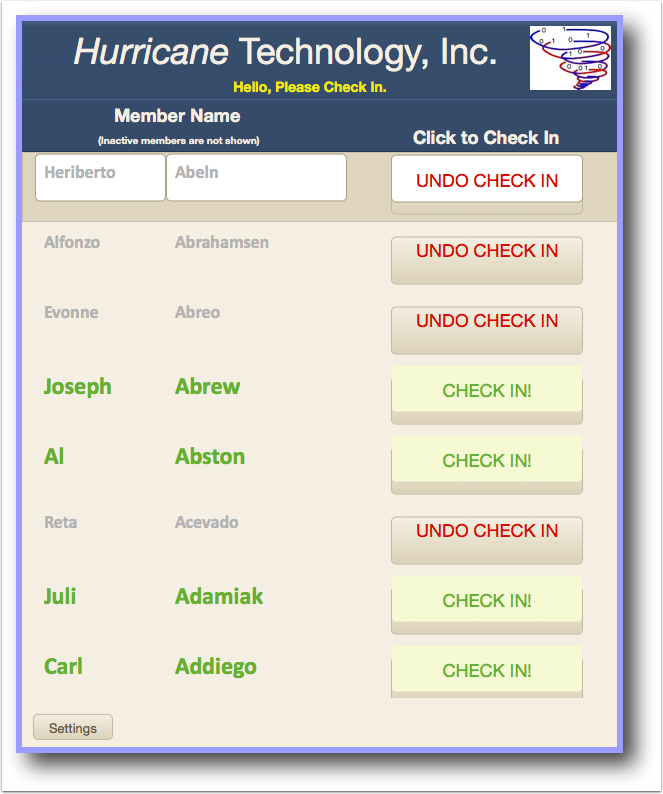
1. The main Check-in Screen
Visitors simply find their names and click "CHECK IN". This button is a toggle so if they find the wrong name, they can uncheck it and check in using the right name.
(Note: names below were randomly generated.)
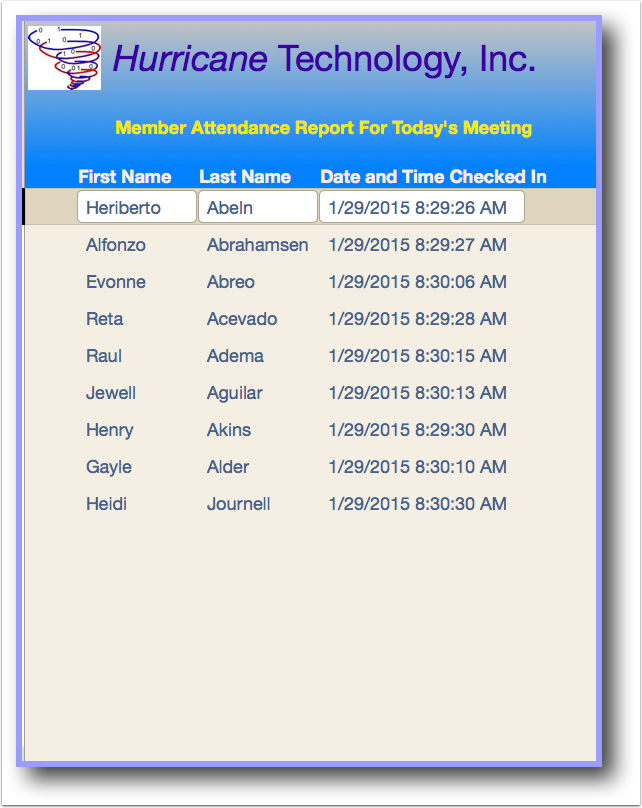
2. Member Attendance Report for the Current Meeting
For each meeting participant checked in in "1" above, the system produces a simple listing report sorted by the meeting participant's last name. Should there be different first names for a given last name, first names are also sorted beneath the last name.
The administrator emails this report to the email address on the admin screen (see 3. below).
3. Administrative Area
The administrator can find and add members on the form below. To find a member, the administrator can type in the last name, or part of it, and just hit "ENTER", "TAB", or click or tap "Find". The administrator can add a new member by clicking or tapping the 'Add' button.
As shown in the screenshot below, as the administrator types in the "Find Member By Last Name:" field, the system incrementally searches for matching last names. Once the administrator sees the last name appear in the top Find drop-down, he can simply hit ENTER, TAB, or click/tap Find.
The administrator can make the member inactive by changing the "Active?" field to "N". Inactive members do not show up in other screens or reports.
The "Last Check in" field gives the administrator a useful calendar drop-down control, but he can manually change the date if needed.
The administrator can also go to the "Check-in View" (see "1." above), which is the most current item. Other options exist for syncing the data in this database with the server, importing new data, emailing support, and checking for an update to the program.
Possibly the most important item below for the administrator is the ability to email the attendance report to the email address shown at the right bottom - to the right of the "To:" label.
After each meeting, the administrator can click the "Reset All Check in Status" to clear the Check in screen - so that all buttons again say "CHECK IN!".
Some features shown below require the server version of the Check-in Application to be running at the same time (sync, for example).

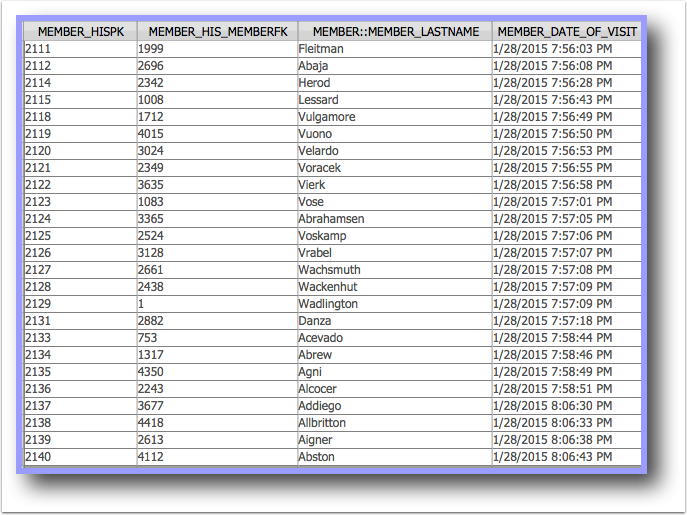
4. Membership History
Although not part of the user or administrator workflow or interface, as stated above, the system automatically maintains history for every meeting attendant check-in, ever.
Given this data, reports using this data would be simple to create.